Position Recovery
This procedure restores and calibrates the Safe Home Position on RobCo Robot systems following a positional deviation during operation.
Procedure
-
Safety pre-check. Ensure that no Emergency Stop (E-Stop) is triggered or active.
-
Fault identification. Identify the affected motor by the red blinking LED on its housing.
-
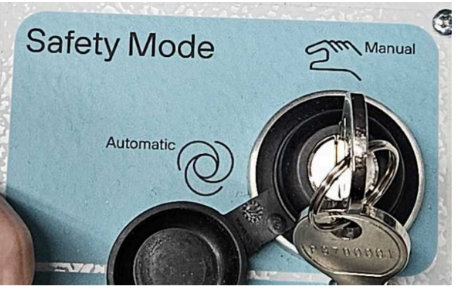
Switch operating mode. Turn the key switch on the Control Unit (CU) to Manual Mode.
-
Activate the hand-held device. Pick up the hand-held device and hold the three-way switch (yellow, elongated dead-man switch) in its center position. Do not press it all the way through!
-
Initiate system reset. Once the Reset button starts blinking, press it. Keep the three-way switch continuously held in the center position.
-
Axis calibration. Using the control panel, move the affected motor to exactly 0.0°. Set the global speed to a maximum of 3%.
IMPORTANTAlways start with the lowest blinking motor. Alternatively, all motors can be rotated directly to 0.0°.
-
Release the switch. Release the three-way switch after the exact position has been reached.
-
Physical zero-position verification. Verify that the motor is actually at its zero position. This is done visually using the milled notches on the housing of the corresponding motor.
-
Confirmation reset. Press the three-way switch again and press the Reset button once more.
-
Save the Safe Home Position. Now hold the Reset button for at least 5 seconds. The motor's LED will stop blinking.
-
Status check and cascading. If necessary, repeat the steps above sequentially for additional motors. Once all Safe Home Positions have been successfully restored, the Robot will illuminate yellow.
-
Brake test cycle. Fully close the Robot's brakes via the panel, then open them again to complete the calibration.
Reducing the global travel speed to a maximum of 3% protects the mechanical components during the zero-point approach and ensures exact calibration of the safety zones.